C/SDL/packaging guide
This guide will show how to build a simple Webrogue application using SDL and package it for Windows, Linux and Android. macOS/iOS support is coming soon!
It is assumed you are familiar with previous guide.
Changes from previous guide
Code of this project can be found in webrogue-sdl-guide repo. Project is similar to one in previous guide, so it must be configured in the same way. But this project has a few changes.
First of all, now we are using C.
main.cpp file is renamed to main.c.
It's content is a common SDL project and contains nothing Webrogue-specific with the only exception: hardcoded path to font to load.
CMakeLists.txt becomes more complicated.
All libraries specified in target_link_libraries command are packaged with Webrogue SDK, so there is no need to compile them from source.
cmake_minimum_required(VERSION 3.22.0 FATAL_ERROR)

project(SDLGuide)

find_package(SDL3 REQUIRED)
find_package(SDL3_ttf REQUIRED)

add_executable(main main.c)
target_link_libraries(main SDL3 SDL3_ttf freetype zlib png webroguegfx c++abi c++)
webrogue.json now includes information about resources and icon.
{
    "name": "simple",
    "id": "webrogue.examples.SDLGuide",
    "version": "0.1.0",
    "main": "build/main",
    "filesystem": {
        "resources": [
            {
                "mapped_path": "/app/FreeSans.otf",
                "real_path": "FreeSans.otf"
            }
        ]
    },
    "icons": {
        "normal": {
            "path": "icon.png",
            "inset": 0.22,
            "background": {
                "red": 1,
                "green": 1,
                "blue": 1
            }
        }
    }
}
We need a font to render text, and path to this font is hardcoded as font_path = "/app/FreeSans.otf";.
FreeSans.otf file is included in project.
Now let's take a closer look at this item in webrogue.json:
{
    "mapped_path": "/app/FreeSans.otf",
    "real_path": "FreeSans.otf"
}
There real_path is a path to FreeSans.otf file in our project, while mapped_path is a path our app "sees" this file.
Icon is required to package Webrogue applications for Android, macOS and iOS, so this project includes fancy 1024x1024 icon in icon.png file and the following record in webrogue.json (no hex colors, sorry):
"icons": {
    "normal": {
        "path": "icon.png",
        "inset": 0.22,
        "background": {
            "red": 1,
            "green": 1,
            "blue": 1
        }
    }
}
.vscode/launch.json file is exactly the same.
Configure and run this app like in previous guide. This project must be built at least once to proceed.
WRAPP
Now let's make a WRAPP file.
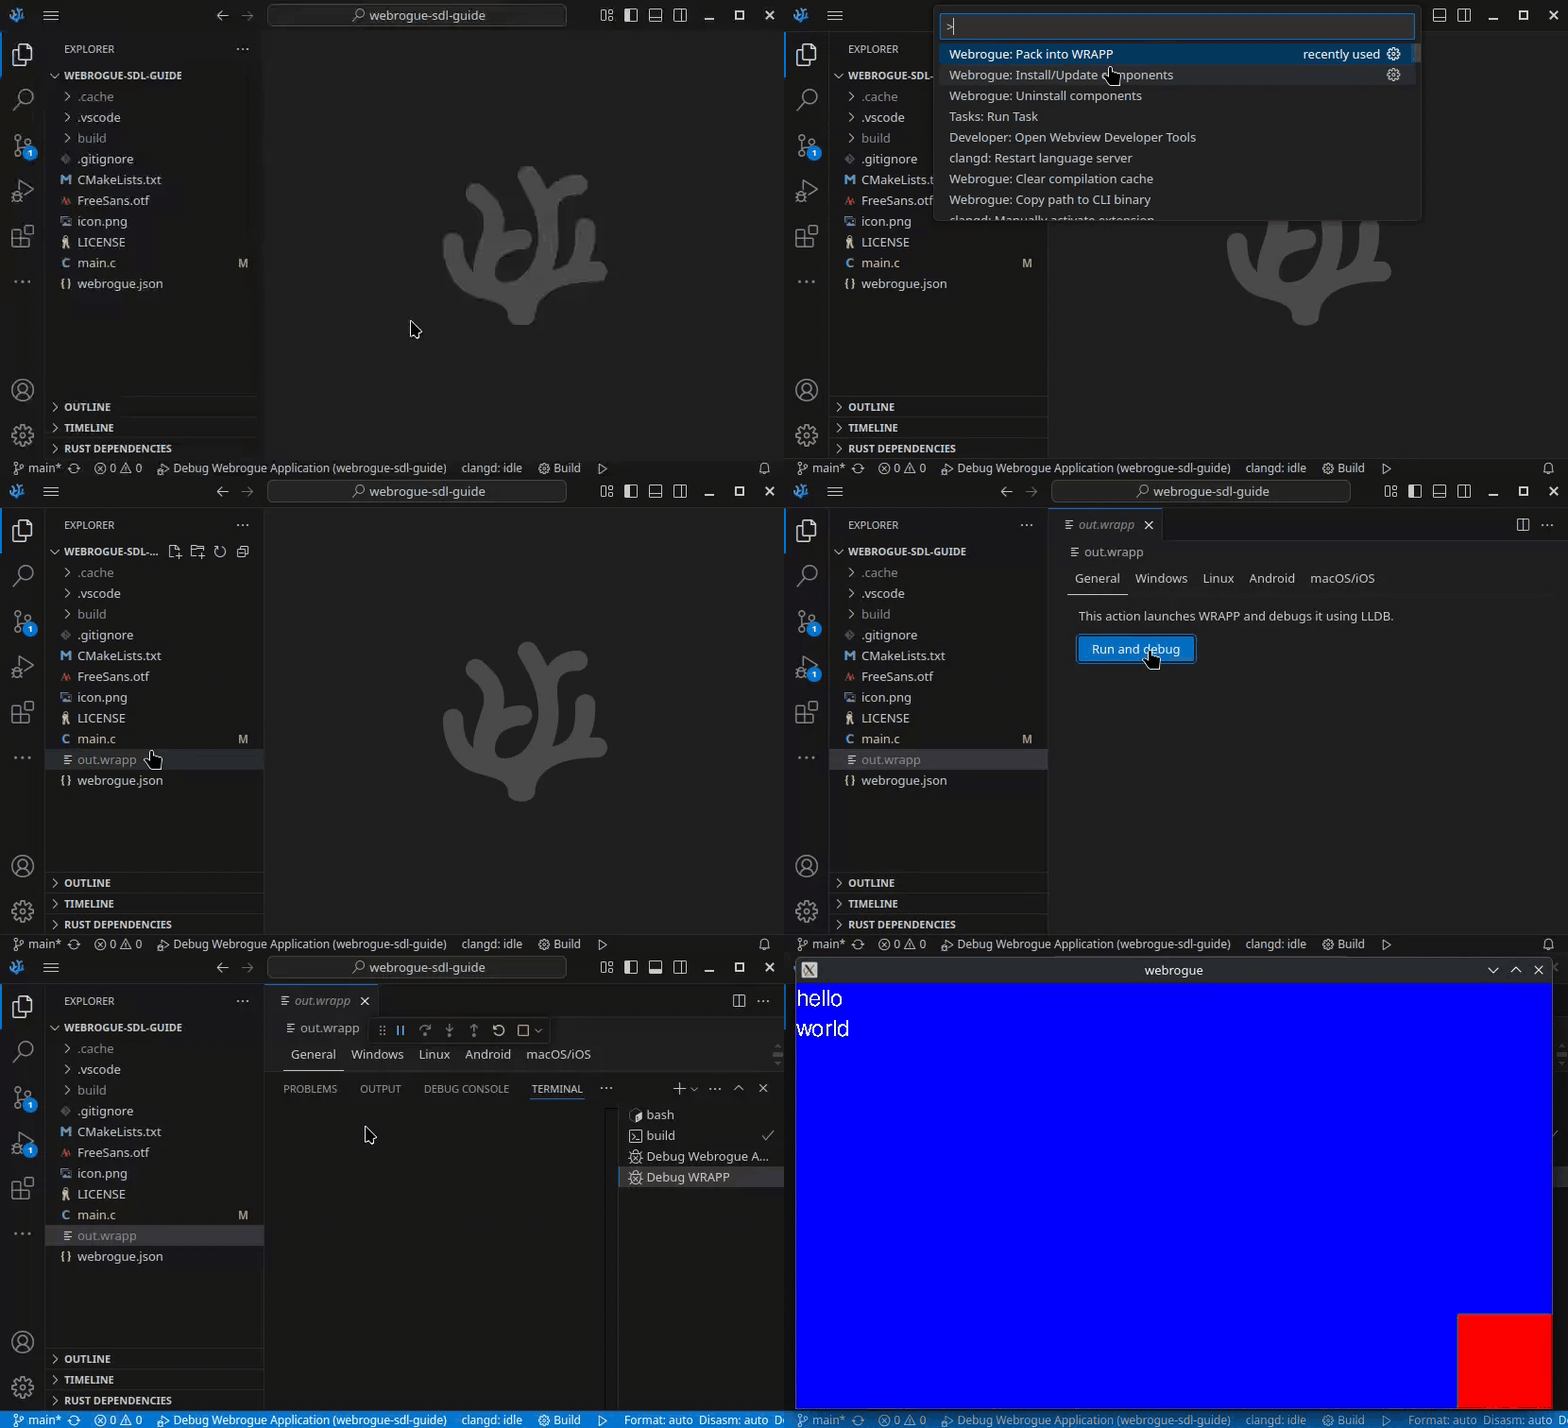
Ensure build/main file exists.
If not, build this project first.
Now run Webrogue: Pack into WRAPP command and select ./webrogue.json file.
out.wrapp file should appear.
Select it and press Run and debug button in General tab.
Our application will launch in debug mode just like using VSCode config.
out.wrapp file contains not only compiled code, but also Webrogue application configuration, icons and resources like /app/FreeSans.otf.
You can move this file to different directory or even send it to machine with different OS, and Webrogue will still be able to run it.

Windows and Linux
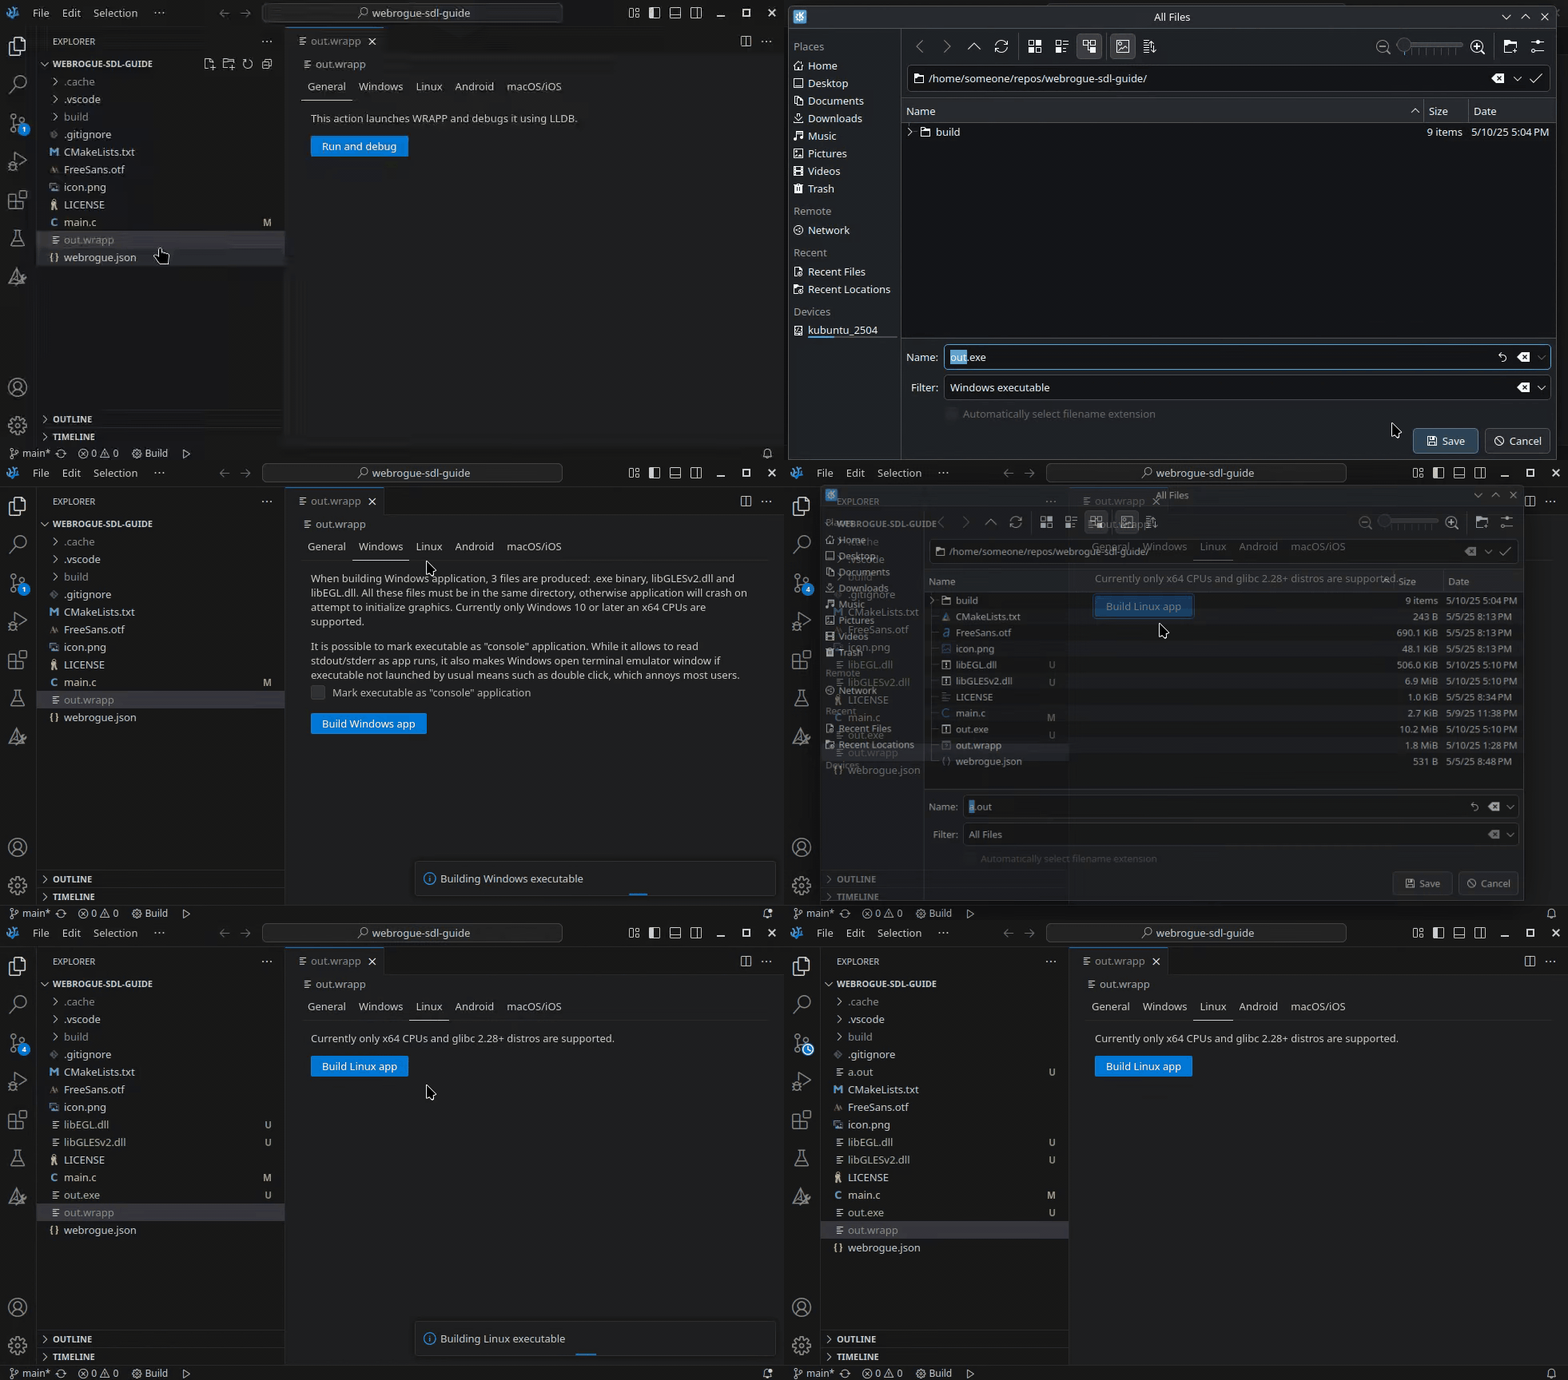
Building for both Windows and Linux can be done just in few clicks.
For windows, click Build Windows app in Windows tap, select destination path and wait a few seconds. .exe and .dll files will appear.
Resulting app doesn't includes resource files such as FreeSans.otf because they are embedded in .exe file.
For Linux, everything is the same for Linux with the only difference: Webrogue generates one file for Linux instead of three.

Android
Building for Android is a bit more complicated because Java and Android SDK are currently required.
Signing key can be applied, but we will check Use debug signature checkbox to make things easier.
Now click Build APK button.
It will take some time for first build, but subsequent builds will take only a few seconds.
macOS and iOS
macOS and iOS support is currently work-in-progress. In any way you will need an Apple Developer account (paid) and macOS device or CI/CD with Xcode installed to support macOS and iOS.